Three emergency stoves

Stand alone complete cooking stove

Stand alone complete cooking stove

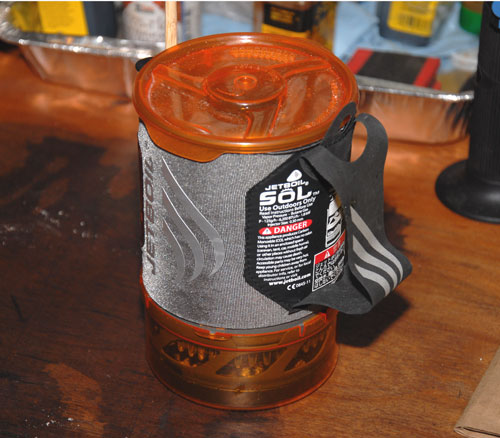
The Jet boil is by far the easiest to use and the ability to control the heat for cooking is what made me start with this one first. Also the igniter eliminates the need for a lighter, matches or striker rod! I have made bannock bread, soup and fried meat for lunch all of which turned out great. It is more than a device to boil water for drinking.


emberlit1
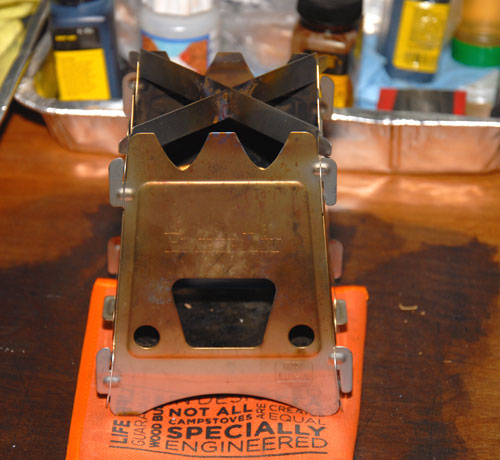
The Emberlit multi fuel stove caught my attention and it does live up to it’s name. I can and have used wood scraps, Coughlin’s stove heat and the Esbit alcohol burner all to boil water so far in my tests.

Esbitadapter

This is my adapter for using the two alcohol burners and it is quit simple. A Myntz can, four bolts and eight (8) NUTS. I drilled four holes (one in each corner) for the bolts then I carefully used JB Weld on the four nuts inside of the can to keep them in place. The other four nuts are tightened up on the outside of the can for stability. I simply remove the outside bolts with the nuts and store them in the canister when not in use. I can adjust the height this way to meet my needs.

Campheat

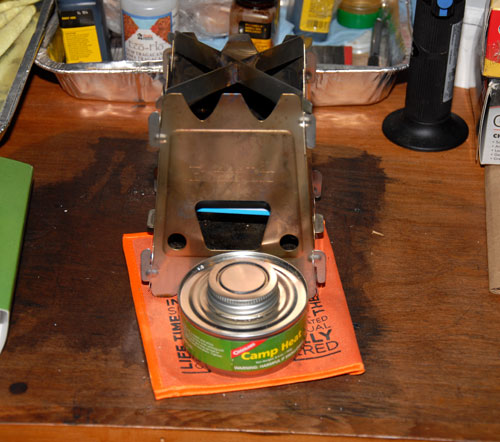
This is the Coughlin’s camp heat canister and even though it has a wick like a candle it will boil two measured cups of water in under three minutes.

Esbitemberlit

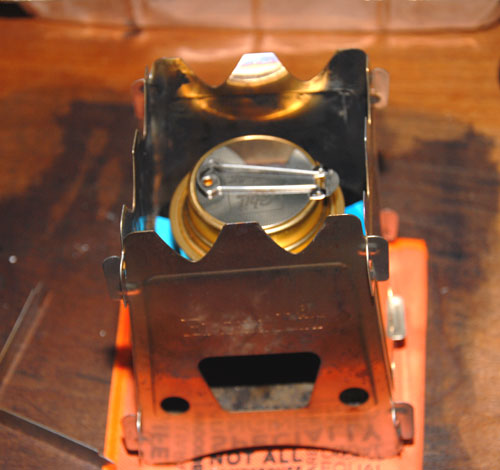
This is the Esbit alcohol burner installed and ready to cook anything I would want cooked. I works with or without the cross bars depending on the base size of your pot!!

Esbit-alc
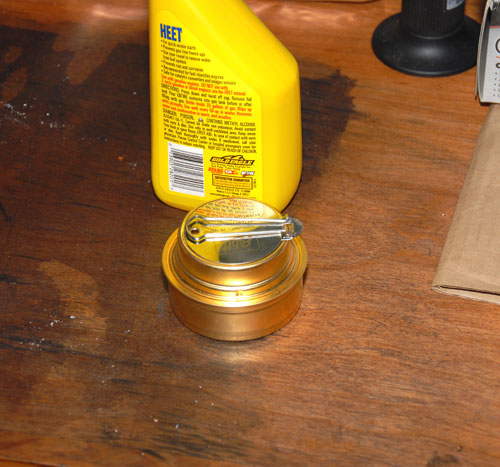
Here is the Esbit stand alone burner with the alcohol fuel. It really does work and for those times when there is no dry wood in the PNW where I live it completes usage of the multi fuel stove. The newer Emberlit stove does have slots in the sides now that will hold this burner in place for cooking but since I had the older model I made the simple adapter above for next to nothing!

First Canadian Bacon in the smoker

So as I did a few slabs of regular bacon I decided to do some Canadian bacon one to see if we liked it and two we think with the less fat it has it might be better for us in the long run. Time will tell but it sure does taste good to me!!!!

Ready to slice

Ready to slice


Canadian Bacon Sandwich

First BLT Canadian style


Home Made Bacon

So we decided to make our own bacon this last week and found a method on the following site:
http://www.amazingribs.com/recipes/porknography/making_bacon_from_scratch.html

The process takes a week most of which is brining the meat to cure it for safe storage. A daily massage of the pork in zip lock bags to  insure complete curing which makes it bacon not pork belly. It is tasty not salty and much better than store bought bacon.

First was the brine, then the smoking and then trimming up the slabs for freezing, (of course a little taste test on the way!!

In The Smoker

Smoked and cooling Test Pieces Cooking Bacon bits freezing


Smoked Steelhead On A Cedar Plank

So I was tired of the cost of store bought Cedar Planks and decided to do my own. I bought cedar fence boards and made my own. Sanded them until glass smooth and cut them to lengths that I could use for individual pieces.
The fish picked up the aroma of the cedar and a bonus was that the skin sticks to the board so serving is simple. Great for Salmon also!

steelhead

Beef Ribs With Corn On The Cob

So we had not done any beef ribs on the smoker/grill yet and we had to do something about that. I used the same basic plan as I do for pork ribs called 3- 2- 1 which is 3 hours on smoke, two hours swimming in apple juice wrapped in foil and one hour unwrapped and basted with sauce (sets the sauce). The corn went in during the last part of the cook and was delicious and tender.

Beef and corn on the cobb

Beef and corn on the cobb

Chicken And Peanut butter sauce noodles

So we did a meal together using the Pellet smoker for the chicken and Sharon did the Peanut Butter sauce and noodles. The chicken thighs were smoked/cooked skinless and had a good barbecue sauce applied as they cooked.

Skinless chicken thighs smoked/grilled and Peanut Butter sauce over noodles with a crisp salad. Does not get any better than this!chicken

Cold Smoked Mixed Nuts

This method uses a smoke generator and no other heat source with the intent to create a lightly smoked flavor to the mixed nuts without the need of salt. I then store them when finished in a vacuum canister where they stay fresh and ready for snacking. The mat is supplied by Amazing Smoker Products as is the smoke generator. http://www.amazenproducts.com/SearchResults.asp?Cat=12

Simple and foolproof products to use. The mat is fiberglass with a Teflon coating so there is a no stick benefit and easy clean up. The smoke generator will work with pellets or saw dust (food grade) for almost 12 hours and you choose the flavor you want..

mixednuts2

want.

Ribs on the smoker my way!

My first ribs on the Traeger pellet smoker/grill. I used the 3 – 2 – 1 – method of three hours of smoke, two hours while wrapped in foil with new sauce applied and then one hour unwrapped with new sauce applied to set the sauce and finish the cooking.

Here are the pork ribs after an overnight soak with our home rub ready to start the three hour smoke.

ribsready


The ribs after the first hour of smoking.

onehourin


The ribs after the three hours of smoke ready for more sauce and a two hour cook in foil.

threehoursin


The ribs wrapped and ready to be opened up and cooked for one more hour without the foil and with a new coating of sauce applied (this cook sets the sauce).

wraped2hours

And after the last hour of cooking, the ribs are ready to be brought in and served for dinner. They were fall off the bone tender and very tasty!

ribsdone6hours